Showing posts with label rusted silencer. Show all posts

Tuesday, July 2, 2013

A bit of love for my Daytona

 My Daytona has been remarkably robust against the rigours of year-round biking but was overdue for a bit of TLC. Although the headers are supposedly stainless steel, they had a black-chrome overlay from the factory. The 1994 Daytona's exhaust system is three-into-two-into-one-into-two and is in five parts: three-into-two header, two central link sections that join beneath the sump, and two silencers.

 The finish of the headers and central link sections had suffered pretty badly over the 71000 miles and 18 years. It was actually fine close to the exhaust ports, where the radiator has shielded it from the weather. Beneath the line of the oil cooler, the headers get a torrid time with road muck and spray blasting at them from the front wheel.
Stainless headers? Doesn't look like it here
My Trophy's exhaust is clearly stainless and had responded well to a rough polish with a brass wire brush on my drill. I remember they had a reddish brown deposit in places, especially around the link pipe that runs under the engine. It looked like rust but it came right off with the drill brush treatment, leaving a shiny silver finish. I hoped I might get a similar effect on my Daytona so got busy. It wasn't anywhere near as satisfying this time. It appeared as though the plated finish had been mainly corroded away, leaving a rough surface over most of the forward downpipes and the two collectors.

 To shift some of this, I had to use an angle grinder with a steel wire brush. This combination made good progress  - not perfect  but the metal work so revealed was perfectly sound and maybe could qualify as stainless steel.

Exhaust downpipes and central collector after angle grinder treatment
I had previously refurbished my Daytona's silencer link pipes with VHT black topped off with VHT clear and was very pleased with the result. It looks a lot like the original black chrome finish and had come through last winter intact. The finish I obtained is obviously nowhere near as hard as chrome but it does seem to be reasonably robust so far. I had some VHT clear left over from another job. I would have used VHT black again but didn't have any left. 

I'd read somewhere online that barbecue paint can work if it is cured properly so decided I'd give it a whirl - seven pounds from HomeBase on a 15% off weekend. The VHT clear might help to keep it in place. If it doesn't work, I'll try something else. As it happens, my home painting efforts on the Trophy haven't been a great success. Maybe I'll get lucky this time.
Headers coated with BBQ paint
 Before applying the VHT clear over the barbecue paint, I wanted to make sure the thinners were gone and the black coating was at least partially cured. So I used my hot air gun on its low setting to heat up the pipes from the inside. I blew air in through each of the five openings (three headers, two silencer exits) in succession, switching each one as soon as I saw smoke coming off of the pipe concerned. I went around each one twice and then left it to cool for an hour.
Refinished headers: will they cope with the heat of normal running? And winter salt?
 I painted the VHT clear over the BBQ paint by applying just enough to get a shine first pass and then immediately going over the whole thing for a second time. I made sure I got plenty around the collectors. Then I left it 24hours before using my heat gun again in the same way as with the BBQ black. After cooling again, I reinstalled the three M6 bolts that blank off sensor holes with copper grease, torquing to 10NM per the factory manual.
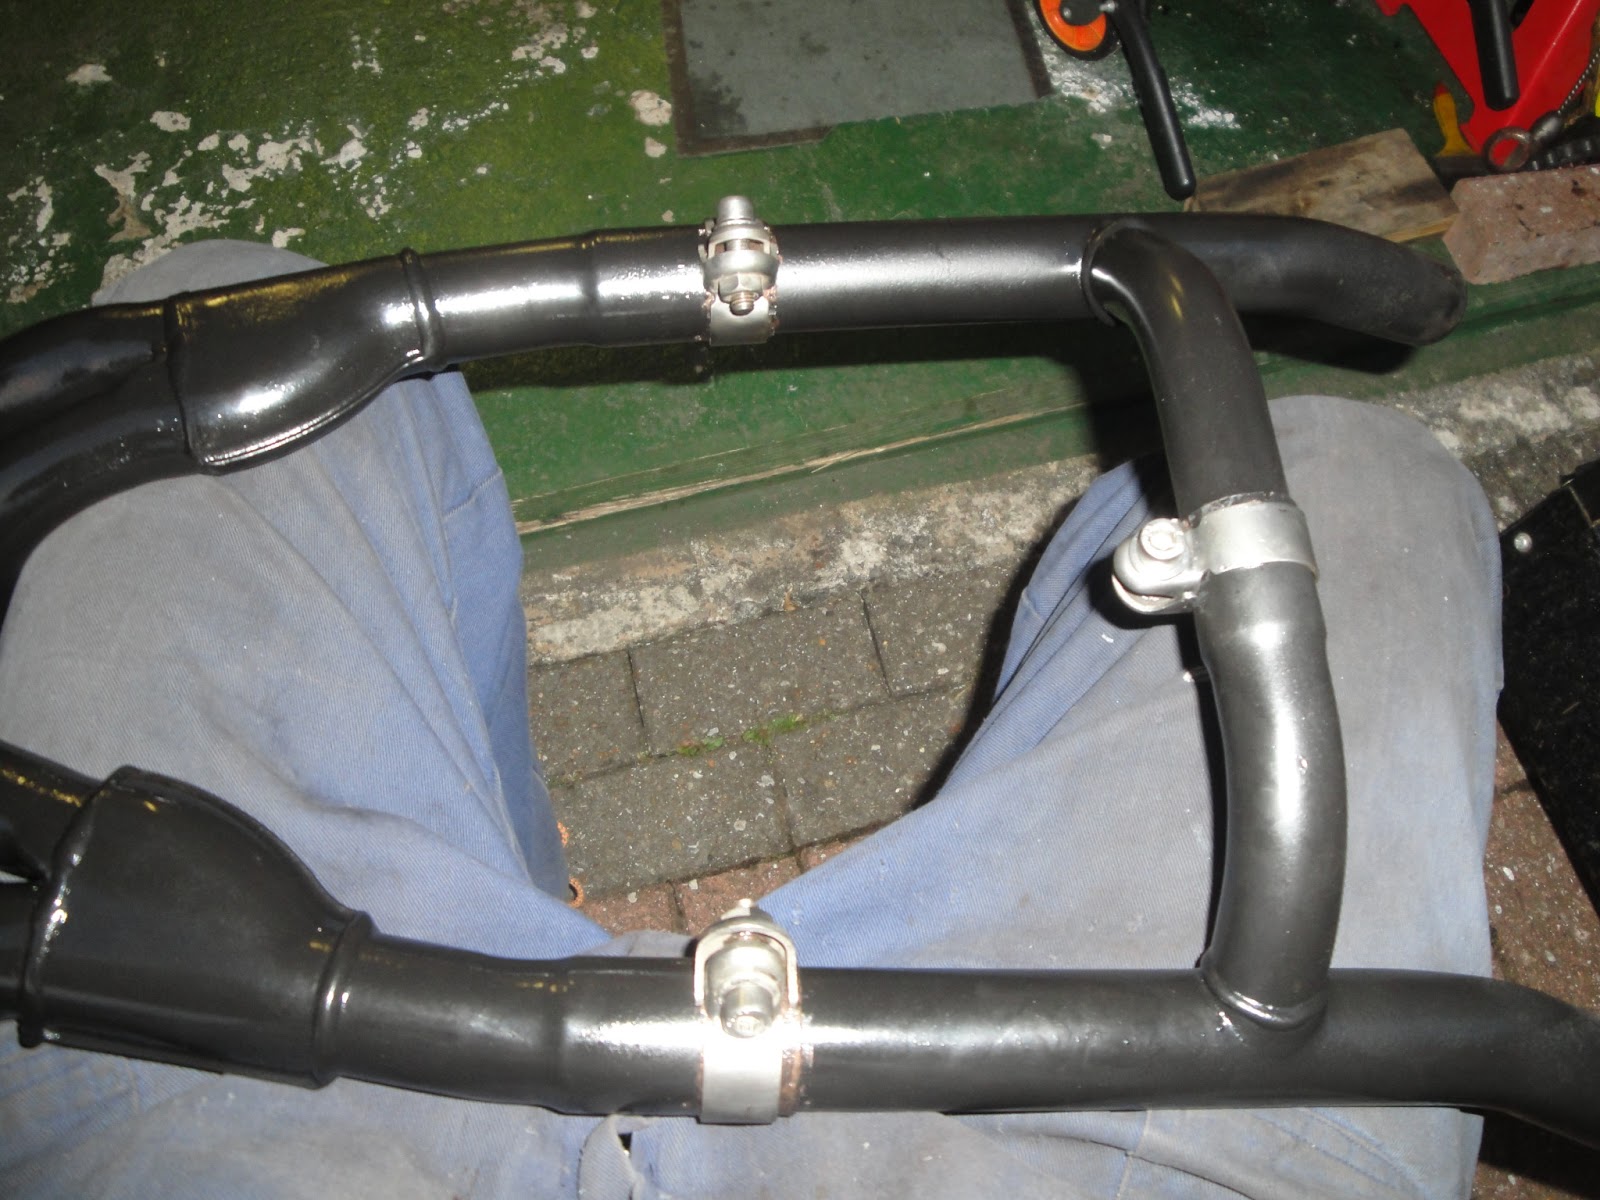
Three exhaust pipe sections back together with stainless clamps
The exhaust pipes are in three sections held together with stainless steel clamps. These clamps came up beautifully. I used a smear of copper grease around the joints of the header sections and inside the clamps to help it all go back together with minimum fuss.

I'm almost too pleased with the way the whole thing has come up. I might try to make up a shield for the headers to stop direct spray from the front wheel blasting them next winter.

Monday, July 16, 2012

Exhausting tales

The exhaust was very clean externally, as the pic below shows. It has two pairs of stainless steel headers, connected with a link pipe that runs beneath and behind the sump. 

The link pipe had a big dent - probably caused by bumping up or down a kerb. The silencers are high quality chromed items, made by Motad for Triumph. 


The exhaust is bolted to a bracket via a rubber insulating bung.

The bracket in turn locates on two of the bolts at the rear of the sump. The lugs on this bracket were snapped off. I don't know for sure but I'm guessing it was because the silencers were stuck on the headers and possibly attempts to wrestle them off had resulted in the snapping of the bracket's lugs. 


I couldn't easily tell the internal condition of the silencers so I knew I'd want to get them off the headers at some stage. It made life hard for me to test fit the pipes around the sump because the length of the system is hard to manoeuvre and the silencers themselves are very heavy.

Attempting to test fit the exhaust was hard work with the
silencers stuck to the headers
 After many months of soaking in WD40, the silencers still refused to give up their grip on the exhaust headers. I decided, with regret, that I would use my minigrinder (Dremel clone) to extend the slots in the end of the silencers to allow me to lever them loose.
Extending the slots in the silencers with a mini grinder. 
I clamped the silencer in my pretend workmate, using a towel to protect the chromework and improve the grip. It kept it all steady whilst I made the cut and then twisted the headers out.

 The right-hand headers and silencer were harder to do than the left-hand side. When I did finally get the headers out, it was clear why.


 The inside of the junction had rusted badly though this wasn't visible from the outside. Rust expands and, beneath the right-hand silencer clamp, had the effect of gripping onto the header ever more tightly. So, whilst extending the slot with my grinder released the pressure, it also just showed up the extent of the rust at this point and so a need for me to replace it.


I was then able to clean off the dirt and surface rubbish with a wire brush on my electric drill. The stainless steel is great quality - it responded well to this treatment. I was also able to reduce the dent in the lower edge of the link pipe using a six-inch extension bar from my 1/2 inch drive socket set. I hammered it in and then levered against the inner section of the dent. It's not a perfect repair by any means but will allow the passage of exhaust gases in the way the designers intended. 

Finally, treatment with Solvol cleaned of the residue left behind by the wirebrush treatment and brought out the colour of the stainless rather nicely. 


I removed the old exhaust gaskets with a small chisel, working down wards and assisted by a little hammer. Great care is needed not to put gouges in the sealing surface. As soon as the chisel had bent the old gasket out by a few millimeters, I was then able to lever out the ring.

 I used copper grease to hold the new copper gaskets (from Sprint) in place whilst I fiddled about with the exhaust headers to get them into position. I put the right-hand pair on first because these are the ones fitted with the link pipe bracket. I positioned the link pipe bracket first and then, holding it in place with my left hand, lifted and knocked the headers into their recesses with my right. The bracket is then retained with an M8 35mm stainless bolt.
Stainless steel M8x35mm bolt retains exhaust headers
at the rear of the sump.
 I had previously replaced the exhaust studs with stainless and used stainless nuts, spring and plain washers to retain the headers.
Oil cooler dangling in front of the headers.

Looking more and more like a bike engine every week.