Saturday, July 6, 2013

A Long Trip Home for An Old Trophy 1200

Now there is a new Trophy 1200, it seems reasonable to describe my bike as an 'old' Trophy 1200. Those venerable owners of a '60s Trophy would no doubt laugh at the idea but time, like a living river, never ceases to flow.

For my second Big Trip, I decided I'd ride number 544 home to Hinckley. First, a spruce up:

Can't have her looking shabby, can we? In the process I found some of the paint on the rear caliper has lifted. My fault - cack handed with the brake fluid last time I bled the brakes. It is interesting to see that the special metals primer is considerably more resistant to brake fluid than Smoothrite. On the plus side, I was gratified to see that the the rubber flap I added has been successsful at keeping road muck off of the swingarm linkages. The were coated in grime but not grit and muck. Fab.

All dressed up and actually ready to go

Comfort break in Bradford on Avon - some more comfortable than others?

A Jumbo at Kemble Airfield


 I stopped at a couple of Landmark Challenge waypoints on my journey. Zoom in on the plaque at the back of the bus shelter to find out why the pub is named after Joseph Arch.

Outside Triumph Factory Number Two
 It isn't too hard to find Triumph at Hinckley after getting to Dodwell Bridge Industrial Estate - there is a sign for 'The Motorcycle Factory'. It leads to the opposite side of the estate from the A5. I have visited a couple of times before, most recently for a factory tour at the Triumph Live 2010 event. I had heard that tours don't run any more so did not expect to be able to do anything other than photograph the bike outside and so it turned out. Friday afternoon may not be the best time to visit because I think the factory is in maintenance mode then.


Those of you who have followed Triumph from the early '90s may recognise the name Jacknell Road. It is the site of the original Triumph Hinckley factory that burnt down in 2002. I was unsure if the site was at all active, or even if it was still owned by Triumph. But this is where my bike - and all 1990s Triumphs - were made. This is as near to 'home' as it is possible to imagine for number 544. So I decided to drive up and down it, just because I'm soft in the head in precisely this sort of way.


My reward was to see that the site is definitely owned by Triumph, very active and called Triumph Motorcycles Factory 1.  A very friendly and professional security guard took the trouble to phone into the factory to ask for permission for me to photograph my bike in front of the building (thanks Kumar!). That was what I had hoped to do. Better yet, a superb gent called Mark came out to see my bike and talk to me about it. Thanks very much Mark. You made my day.

Mark is in the warrantees and service arm of the business. His top tips for keeping T300s in good shape is to always use a torque wrench when tighting up the chain adjusters and to change your coolant no less frequently than every three years. Especially the coolant! You have been warned.

Any nothing much else troubles him in the servicing line for T300s. They are built like tanks, as we know.


 Last Landmark of the day: Moira blast furnace near Burton-on-Trent

Hand prints were cast into the uprights at the heart of the Moira furnace

OK, so it is clear that Triumph Motorcycles Limited has a loose connection to the firm that Mr Edward Turner made famous but I wanted to visit Meriden, where the second Triumph factory used to stand. The connection between Meriden and Hinckley Triumphs is deeper than corporate historians can see. A number of the former employees of the Meriden factory went to work at the Hinckley plant. One of them featured in an early Hinckley brochure coach lining Thunderbird tanks. Even if that was not the case, the care and enthusiasm lavished over these machines, whether made in Meriden or hewn in Hinckley, has infused them with something of a shared spirit. Their common heritage, not just the name on the tank, sees a number of them in common ownership today. So I don't think it entirely silly that I chose to stop by Meriden, to ride the roads that factory testers would have belted along on T20s, T90s, T100s, T110s and of course the unapproachable T120. Hearing the totally different sound of a T300 echoing off of the town walls, filling the centre around the monument to fallen cyclists, I was sure the ghost of Mr Turner would have smiled in appreciation.

Late in the day, so it was all closed up, but the National Motorcycle Museum is only a few miles away from Meriden so I pulled in for a couple of pictures. 

A legend outside ...

... where Legends Live On

Wednesday, July 3, 2013

Alternator - sheered bolt and squashed cush rubbers

My Daytona had been rattling for ages from beneath the carbs. I'd noticed it only did this when the alternator was not under load. As soon as I switched the lights on, the rattle went away. Amazing but true. The light switch was a rattle controller! 

Reading around, I'd found people with this problem saying it was to do with a worn alternator cush drive. On a visit to Sprint, I talked to Trevor about it and he said it was far more likely to be a problem with a bolt that holds a rotor onto the alternator itself. It turned out to be both ...

The pictures above show the bolt loose on the driven rotor (23 in the schematic) and the replacement bolt next to the remains of the original to show how much was left in the alternator rotor. The drive and driven rotors have four vanes the fit into one another, cushioned by eight rubber segments as the 'cush drive' (number 20 in the schematic below).
Parts schematic for alternator drive gears
 The pics below show the worn cush drive rubbers in the drive rotor and comparing them to the new replacements.


I'd also had some trouble with the starter motor so pulled that off at the same time as removing the alternator. This meant draining the coolant because the rear coolant hose runs from the back of the cylinder block to the pump and obscures the starter.

Draining the 900's coolant - looking grubby ...
... but the black finish always comes up really well with degreaser and a bit of gentle agitation
The bolt that retains the driven rotor is 'encapsulated', meaning it comes coated with a vibration-resistant coating. As a result, it was hard work to get the remains of the original bolt out. I had to drill it right through. The main trick is getting the drill bit central in the remains of the old one and holding the work still. I don't have a pillar drill but a Record drill stand and press vice. The alternator is a very awkward shape all the same so I had to put a lot of packing around it to get the press vice to grip.
Drilling out broken M6 bolt with a 5mm HSS bit

After drilling and cleaning threads with a tap

 I'd done a fair job but the internal threads were clipped by my drill. Fortunately the encapsulation is meaty enough for me not to worry about that too much. I was able to torque it up carefully to the recommended level so all looks well.

Torquing up the replacement bolt, holding the driven rotor with an adjustable spanner
The replacement cush rubbers make for a close fit between the drive and driven rotor. I held them into the drive rotor with red rubber grease. It was a fiddle to line up the vanes on the driven rotor to get the alternator back in place but eventually went in with zero slop.


Mission accomplished.

Tuesday, July 2, 2013

A bit of love for my Daytona

 My Daytona has been remarkably robust against the rigours of year-round biking but was overdue for a bit of TLC. Although the headers are supposedly stainless steel, they had a black-chrome overlay from the factory. The 1994 Daytona's exhaust system is three-into-two-into-one-into-two and is in five parts: three-into-two header, two central link sections that join beneath the sump, and two silencers.

 The finish of the headers and central link sections had suffered pretty badly over the 71000 miles and 18 years. It was actually fine close to the exhaust ports, where the radiator has shielded it from the weather. Beneath the line of the oil cooler, the headers get a torrid time with road muck and spray blasting at them from the front wheel.
Stainless headers? Doesn't look like it here
My Trophy's exhaust is clearly stainless and had responded well to a rough polish with a brass wire brush on my drill. I remember they had a reddish brown deposit in places, especially around the link pipe that runs under the engine. It looked like rust but it came right off with the drill brush treatment, leaving a shiny silver finish. I hoped I might get a similar effect on my Daytona so got busy. It wasn't anywhere near as satisfying this time. It appeared as though the plated finish had been mainly corroded away, leaving a rough surface over most of the forward downpipes and the two collectors.

 To shift some of this, I had to use an angle grinder with a steel wire brush. This combination made good progress  - not perfect  but the metal work so revealed was perfectly sound and maybe could qualify as stainless steel.

Exhaust downpipes and central collector after angle grinder treatment
I had previously refurbished my Daytona's silencer link pipes with VHT black topped off with VHT clear and was very pleased with the result. It looks a lot like the original black chrome finish and had come through last winter intact. The finish I obtained is obviously nowhere near as hard as chrome but it does seem to be reasonably robust so far. I had some VHT clear left over from another job. I would have used VHT black again but didn't have any left. 

I'd read somewhere online that barbecue paint can work if it is cured properly so decided I'd give it a whirl - seven pounds from HomeBase on a 15% off weekend. The VHT clear might help to keep it in place. If it doesn't work, I'll try something else. As it happens, my home painting efforts on the Trophy haven't been a great success. Maybe I'll get lucky this time.
Headers coated with BBQ paint
 Before applying the VHT clear over the barbecue paint, I wanted to make sure the thinners were gone and the black coating was at least partially cured. So I used my hot air gun on its low setting to heat up the pipes from the inside. I blew air in through each of the five openings (three headers, two silencer exits) in succession, switching each one as soon as I saw smoke coming off of the pipe concerned. I went around each one twice and then left it to cool for an hour.
Refinished headers: will they cope with the heat of normal running? And winter salt?
 I painted the VHT clear over the BBQ paint by applying just enough to get a shine first pass and then immediately going over the whole thing for a second time. I made sure I got plenty around the collectors. Then I left it 24hours before using my heat gun again in the same way as with the BBQ black. After cooling again, I reinstalled the three M6 bolts that blank off sensor holes with copper grease, torquing to 10NM per the factory manual.
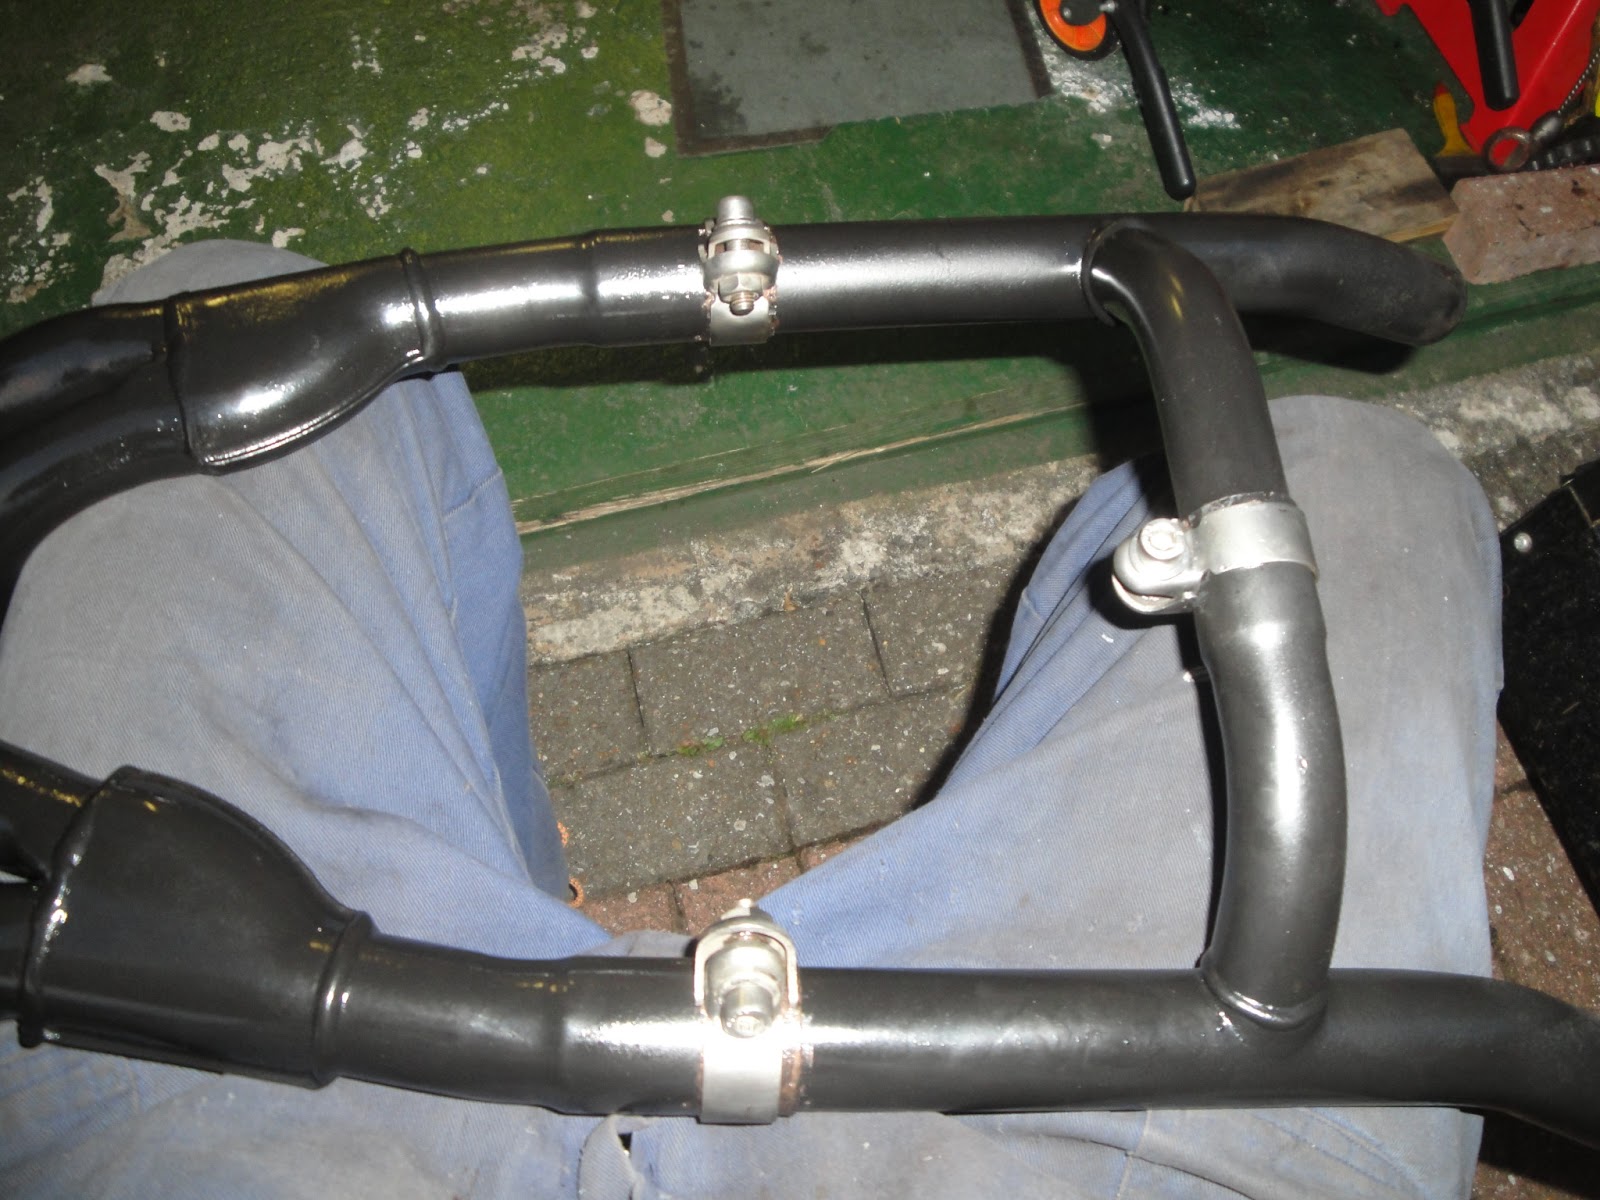
Three exhaust pipe sections back together with stainless clamps
The exhaust pipes are in three sections held together with stainless steel clamps. These clamps came up beautifully. I used a smear of copper grease around the joints of the header sections and inside the clamps to help it all go back together with minimum fuss.

I'm almost too pleased with the way the whole thing has come up. I might try to make up a shield for the headers to stop direct spray from the front wheel blasting them next winter.