Showing posts with label gearbox sprocket. Show all posts

Friday, August 8, 2014

Horrible clonking from my gearbox ... no longer

I had noticed a loud clonking banging noise coming from my gearbox at low speed. This was especially going up hill between 10 and 30 mph. It cleared above 30mph and the rate of clanking was the same regardless of the gear (and hence rev rate) the engine was pulling. That meant whatever it was, it was on the output side of the transmission. Needless to say, I was depressed at what it might mean. Google search suggested a whole range of horrors but - wait - also a suggestion that might just save me.

Apparently, some forum posters had diagnosed a similar problem as nothing more sinister than a worn chain. Internet advice was to check for stiff or frozen links that might be causing the chain to ride up on sprocket teeth, then slap down again to create a banging noise. However, my chain looked great. I put the bike on the centre stand and checked every single joint with two pairs of pliers. All moving smoothly. Clean and well lubricated, courtesy of my Scott Oiler, and no hint of any stiff links.

Comparing standard Trophy (left) and modified Daytona (right) sprocket covers

Daytona sprocket cover with 12mm holes for inspecting gearbox sprocket
I had previously modified my Daytona sprocket cover so I could inspect the gearbox sprocket without draining the oil. At my last oil change, I had drilled three 12mm holes at an appropriate radius the gearbox output shaft. The sprockets showed some clear signs of wear but not particularly worrying, I thought. Then I noticed that the Haynes and Factory workshop manuals quoted a maximum wear limit for the chain as 319mm for a 20 link length. It isn't possible to measure this length along the bottom run of the chain because the exhaust and subframe get in the way. So I removed the chain guard and saw 20 lengths of my chain were at 320mm. Let's say, at the wear limit.

I decided to try a new set of chain and sprockets. The chain was on the bike when I bought it and so has lasted at least the 9500 miles I have covered since obtaining the bike. Who knows how many it had covered beforehand. I decided to make another trip to see Trevor. He offers DID and a cheaper (Triple S) chain options. I so rarely need to change a chain, and in my younger days suffered so often with 'bargain' chains, for me it was a no-brainer to spend a bit more for the fantastic quality of genuine DID.

Contents of a DID VX chain and sprocket kit from Sprint Manufacturing
Trevor also sells Sunsstar gearbox sprockets too - again super quality - and includes a gasket for the sprocket cover and locking tab washer in the kit. All for £140. I was happy with that.


Having split the old chain, by first grinding of the rivet heads and then pressing out the old soft link, I was able to measure the wear on the pivot pin. In the picture above, the wear line is visible but it was less than I had imagined - the step is about 0.2 mm so about 5% of the thickness of the pin. The gearbox sprocket was getting to the end of its life. 

I'm guessing the accumulation of wear on the chain 'stretching' the distance between the pins under load, plus the gearbox sprocket, was allowing the riding  up and dropping of the chain at low speed. At higher speed, the centripetal acceleration could have prevented this as the chain was more uniformly pushed out from the rear sprocket, effectively gripping the gearbox sprocket more firmly. 

Locking tab washer in place

I treated the new Sunsstar sprocket to a dousing of paint because it appeared to be in bare metal. It took quite a bit of jiggling to settle on the splines of the output shaft. It was a really satisfying fit when it went home. Beautiful close tolerance for a part that is under huge pressure in operation. 

DID VX Professional, torqued up gearbox sprocket and
tab washer flattened into place. Perfick. 
I have a chain splitter and riveter kit. It was a bit pricey but rewarding to use with a pricey C&S kit. I measured the external width of the fixed links as 20.5mm so clamped up the soft link to the same degree. The gearbox sprocket nut was then torqued down but selecting first gear, turning the rear wheel against engine compression and standing on the rear brake.

And the result?

No more clonking any more. A result indeed.

Saturday, June 16, 2012

Under cover and on the case

Having got compression again with spark plugs back in the engine, and the back brake in working order, I could torque up the gearbox sprocket again and move on to replacing the refurbished engine covers. The sprocket had been very loose on the gearbox output shaft when I'd dismantled it so I wanted to be doubly sure it was firmly secured. Doubly sure means properly torqued up and the lock washer fully hammered down.   
One foot on the rear brake pedal,
the engine in first gear and rotated
up against compression, a lot of force
can be applied to the sprocket nut.

Drifting down a tab on the lock washer.
Things are starting to come together now to the point that a lot of the work I've done on other components is slotting into place. It made sense to refit the starter motor because access is just that bit better before the other engine covers are in place. The rear of the starter is blocked by a large water pipe that connects the rear of the cylinder block to the water pump.  

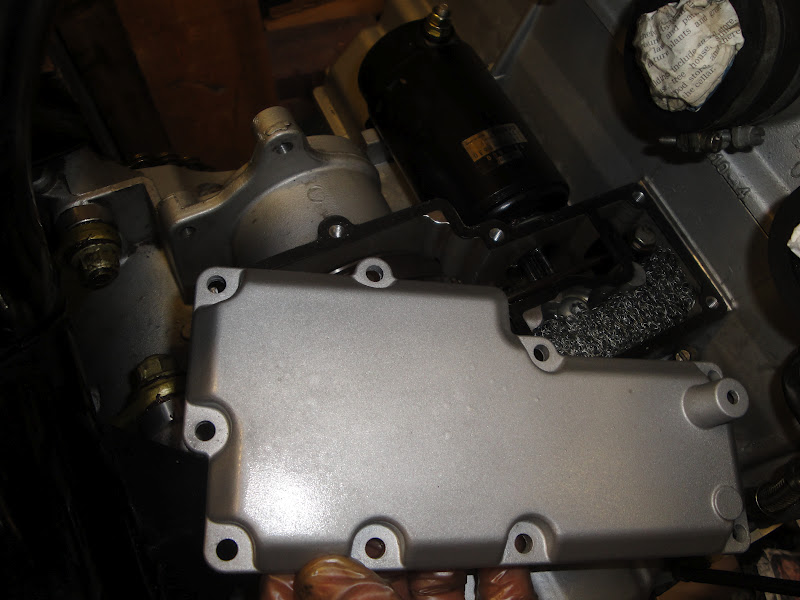
The starter engages with a gear train beneath an inspection cover behind the cylinders. On this very early 1200, there is a steel condenser mesh in a small compartment next to the gear train. A small link pipe connects the engine breather from the clutch cover to this condenser compartment, and another link pipe then connects from the condenser to the air box. Later models use a single pipe to connect the clutch cover breather to the air box. 


Slightly out of step to the way I did it but the clutch cover went on with a bit of fiddling. I wiped over the clutch basket with a WD40 and kitchen towel first - it has been open for about 18 months and had picked up quite a bit of dust and dirt. It was only tricky because of the bend in the little breather link pipe. I'd put a braided cover on it which may have made it less flexible than normal. 


 Meanwhile, back on the drive side, I'd got sprocket cover, alternator, water pump and crank end cover all ready to replace. Again, the internal surfaces of the engine all benefitted from the kitchen towel and WD40 trick. The difference under the crank cover is easy to see.


 Before the sprocket cover goes on, it's easier to reinstall the clutch pushrod. It's a very long steel bar that passes through a small seal just in front of the drive sprocket, and then into a housing in the sprocket cover for the clutch slave cylinder.

The sprocket cover also hold the dipstick. The dipstick protrudes into a small box cast into the sprocket cover which then runs full of engine oil when in service. The threads on this early dipstick are much finer than the ones on my 1994 Daytona 900. I prefer these early fine ones - I've crossed the coarse threads on my Daytona's dipstick twice. Very irritating.

The gear change shaft extends through this little box so is fully lubricated. There is a needle roller bearing in the sprocket cover so that runs in oil too. It could be one of the reasons that the gear change has such a positive and, with good oil at least, slick action. I protected the oil seal in the sprocket cover by wrapping the splines on the gear change shaft in electrical insulation tape before tapping the cover over it. The bad side of it is that it is only possible to check or change the gearbox sprocket with an oil change. I can live with that for the benefit of having the gear change shaft needle roller fully lubricated. Each to their oe


The sprocket cover is retained by five bolts plus another two very long bolts that also retain the clutch slave cylinder. I've been working on the clutch hydraulics today. They appear to have been depending on orange sludge rather than hydraulic fluid :-(


Monday, May 14, 2012

Utterly horrible

I'd meant to post 'before' pictures of the drive sprocket and its housing with the 'after' pictures from my last post. Externally, things weren't too bad. Underneath the slight patina of age that adorned the sprocket cover, it was a whole different story.


Removing the sprocket cover revealed an utterly horrible sight: years of sticky chain lube plus road dirt and metal particles from the terribly worn sprocket, all packed tight around the chain and clutch pushrod.

I scraped all the muck out into some old newspaper, with judicious use of a large screwdrive. I swear, it must have weighed a kilo - like a generous portion of fish and chips.

The sprocket was loose on the gearbox output shaft - the lock washer was the only thing that had stopped it coming off altogether. Nasty. At least I didn't have to fight to remove it.

Although I've seen pictures of teeth in worse condition before, I'd never come across a sprocket with more wear than this myself. The teeth were no more than a third of their original width and distinctly hooked. More like barbs than teeth. Here's a repeat of an 'after' picture for easy comparison.


Sunday, May 13, 2012

Reassembling final drive

I decided to gear the bike up for a lazier ride. So I got a 19 tooth gearbox drive sprocket, one tooth larger than standard, and a 42 tooth driven sprocket. 


It is impossible to torque up the gearbox sprocket nut to the required torque of 132NM without being able to stop the sprocket from rotating. I have found the best way to do this is to put the gearbox into first gear and to hold the rear brake on. That way, the gearbox sprocket is held still by a combination of engine compression and brake pressure. So it was time to fit the rear wheel.


Mushroom type spacer on right
of wheel. The wide end butts up
against the rear brake bracket

Rear wheel spindle, spacer, rear brake
bracket, bush and wire retaining clips
The rear wheel fits onto its axle between a small alloy spacer on the left and two spacers on the right.  The right-hand spacers are a large, mushroom type spacer that fits into the rear wheel, and a large aluminium bush that fits into the centre of the brake bracket.

The rear wheel, fitted with sprocket carrier and small, left-hand spacer, has the chain looped over its sprocket pushed well forward to maximise chain slack. The eccentric chain adjusters should also be turned so they are aligned to the same marks on the swingarm and pushed slightly outwards from the centre of the bike before being nipped up with an Allen key. This makes the gap for the rear wheel as wide as possible to help you get the axle through. It's easier to see what's happening this way.

The rear wheel spindle needs to be fitted from the left because it is isn't easy to manoeuvre the wheel into place, and the sprocket carrier side is the heavier of the two. I put a wooden block under the wheel to help support the weight.
Greasing the large aluminium
bush for the centre of the rear
brake bracket

Axle right through, bolt being
wound home. The gap between
eccentric adjuster and brake
bracket is visible here. 
I used plenty of Castrol LM on the mating faces of all the spacers, the brake bracket bush, and the axle itself. With a  bit of wiggling and the assistance of a rubber mallet, the axle through each of the components in turn.

The right-hand bolt is wound in with at 12mm Allen key, pulling the swingarm legs together against the spacers. I nipped up the axle bolts at this point before slackening off the eccentrics to adjust the chain tension, and to allow them to move inwards to their correct position.

132NM of torque for the gearbox sprocket
I refitted and bled up the rear brake and then was ready to torque up the gearbox sprocket.


It worked a charm but needed a steady hand and my largest socket (36mm). That just leaves the flattening of a tab on the gearbox lock washer  - that done, job's a good un.