Thursday, June 27, 2013

79mm nikasil liners compared to 76mm iron liners

Trevor let me take some measurements off of a T595 liner. I didn't have my camera with me so I can't post pics of it. The pictures below are from an old T300 liner I have had for ages. There are three important circumferential measurements: the depth of the spigot that fits into the top crankcase, and two distances across the upper portion of the liner. There are two of these because two sides of the upper surface are machined flat to allow the set of liners to fit side by side in the crankcases.
Spigot measurement; machined flats visible above


 I made a diagram to show how the liners compare. The nikasil liner for the T595 79mm piston looks very different from the iron liner pictured above. The ally casting includes vertical flutes in the upper portion, presumably to add strength and to aid in heat dissipation. The upper and lower circumferences are wider, as expected but not by a great deal. The lower spigot is 84.5mm compared to 82mm - so 2.5mm would have to be machined out of the upper crankcase for them to fit. However, the flats in the wider part of the casting make it effectively identical - 87.5mm compared to 87.2mm. In fact, that difference could just be down to my inexpert use of the vernier caliper.
Comparing dimensions of T300 iron and T500 nikasil cylinder liners

I also measured the distance across the top crankcase to make sure the wider nikasil liners would fit without having to thin down its walls - something I would worry about. It is 105mm so no problems there. I'll measure up the internal dimensions again when I manage to get the liners out of my 2001 Trophy 1200 engine.

These other pictures show the gunk around the iron liners in the 2001 motor. It appears to be an oily carbon paste. However, the bores look to be in very good condition. Most puzzling.


Wednesday, June 26, 2013

The Need for Speed: 'She can nay take much more of this, Jim'

Or can she?

All Hinckley Triumph engines produced from 1991 to 1995 had the same 76mm pistons and iron cylinder liners. The only difference was in the stroke (55mm or 65mm) or number of cylinders (three or four). This is the essence of the T3 engine series.

The advent of the T5 series, specifically the T595, changed this - 79mm pistons and nikasil coated alloy liners came along with a completely new engine design. Only it was completely completely new. The stroke was the same 65mm as the T3 900 and 1200 motors and gudgeon pin size is the same. I think the conrods are also the same. So Hinckley triples eventually all became 955 cc, courtesy of a 3mm wider bore (pie ar squared eitch times three = 955825.652). What if the fours had followed a similar progression? 39.5 x 39.5 x 64 x 3.1415927 x 4 = 1274434.202.

I had heard that it is possible to fit 955 liners and pistons to the T3 engines and, searching web forums, came across a few references to Jim's Thunderbird. The first Hinckley Thunderbirds were very similar to the other triples in the range - same pistons and liners as the Trident, Speed Triple etc. The cases are different though essentially in only cosmetic ways. 


Unfortunately, the links to Jim's article were all broken. Then I remembered the WayBackMachine and was happy to see the article had been archived.

Jim Bush, a gentleman from Canada, managed to machine his 885cc Thunderbird engine cases so they would accept liners and pistons from a year 2000 Daytona 955i. In fact, he also found the cams were interchangeable on the triples.
 The key part of the article is:

"In August this year (2003), I decided to take the plunge and tear down the Tbird – I needed to do the starter sprag gear upgrade anyway (a $2600 fix at a local shop). Once all the oil was cleared away, I was able to determine that the cylinders of the 955 were on the same centres as the 885 which meant that the sleeves could essentially fit. The stroke was the same on both engines, just an increase in bore. I found the cams were interchangeable, but the gearbox was not – it was 32mm narrower, so I couldn’t transplant the 6 speed trannie which I had been really counting on (bummer!). Buy hey, I could now install the starter gears, machine the engine casing to accept the 955 sleeves, use the 955 11:1 forged pistons and heavy duty Daytona rods, install the Daytona cams and valve springs.
 
The cylinder sleeves are quite something. On the Tbird they are cast steel and weigh it seems about 4lbs, the Daytona sleeves are an Italian make, Girdonelli cast high-grade aluminum alloy, Nikasil lined and weigh in a less than 1lb. This is top drawer stuff. The sleeves are a push fit in the crankcase, sealed to the case with a bead of goop, surrounded with coolant and held in place by the cylinder head – modern technology at its finest.


The install was easy, 2 hours on the milling machine to fit the sleeves and just follow the instructions in the manual for the engine rebuild, not much in the way of special tools required. Changing the value springs over, was time consuming with 12 values to do on each head. A good thing I did this, as I did find a broken valve spring on the old Tbird head – it would obviously not hold up to the same duty as the Daytona. The stock Tbird cams have 7.2mm lift and 211 deg duration, the new Daytona cams have 9.3mm lift and 255 deg duration. New gaskets and oil was the only expense (about $150 all in - big ticket was the head gasket at $75). I had already acquired and fitted a 885 Sprint computer control box for $60 off eBay – this provides a good ignition curve and eliminates the rev limiter at 8750 – puts it up to 9750rpm (maybe that is why I had broken a valve spring).
 
So after two weeks, I had the Jeckle-n-Hyde 955 Tbird running. There are no visible external modifications, it’s a true sleeper. I still have a bit of work with the air box and carb settings, but it runs very differently from the 885 before. I was worried that the low end grunt that the Tbird is famous for would be lost, but in fact I have found the very low down torque is enhanced by the extra 70cc displacement. My reckoning with all these upgrades and with keeping the restricted stock Tbird cylinder head (which could do with some porting), I should be around 100hp or just above – I have some dyno time planned and will do a test to see how much I did gain. This has got to be some of the cheapest bolt on ponies I have ever done – but without a donor engine it would be totally unaffordable. New parts prices on the Triumph range are very expensive."

The full article can be read on this link (as of June 2013 at least - no guarantees with web URLs):
http://web.archive.org/web/20080530014114/http://www.jba.bc.ca/NFS-2.htm

So I'm wondering, would it also be possible to fit 955 liners and pistons from one of the 955 models in to the late Trophy 1200 casings? The upper cylinder casting is notably different from the earlier cases by being contoured around the cylinder liners. The earlier casting is basically a rectangular box, as can be see from the photo in Jim's article above.

Saturday, June 22, 2013

From the very first to the very last T3 1200

Some time around 2000, Triumph completely redesigned the crankcases and cylinder head of the T3 1200 motor. They had already done a redesign on the cases a few years earlier, doing away with the inspection cover over the starter and alternator gears. That change is not good news for anyone who suffers from the famous broken sprag clutch problem. The final change seems to me to have brought a lot of the design ideas used on the T5 engines across to the 1200 four whilst retaining the same cam cover, timing cover and sump castings for some reason. The clutch, LH crank and sprocket covers are all completely different. 

 I had been looking out for a cheap late Trophy 1200 engine for a while, just to play with as much as anything. Well, eventually one turned up at a very reasonable price in grotty and 'as seen' condition. I just wanted something to strip it to see how Triumph finished off the T3s so the fact that it was ropey didn't worry me too much.
 From the RHS, the simpler construction is obvious. The head is visibly similar to the T595, with two external M6 bolts outboard of the camchain and vestigial finning. The clutch cover is also much simplified and incorporates the oil filler. Breathing is through the LH crank cover on these motors, rather than in the clutch cover. The sprocket cover is not longer oil bearing. A sight glass is fitted beneath it.
LHS of late motor, 'breathing' crank cover and oil sight glass.
 A wet black motor always looks new. Sadly, it wasn't quite as good on the inside.

The oil was very thick, almost treacle-like in consistency. On the other hand, I had expected to find a considerable amount of shrapnel in the sump. Not at all - just some aluminium shavings that looked to me as if they were left over from manufacture. And instant gasket, no doubt washed down from the head where it had been generously applied at some point.

 The internals looked pretty clean - no obvious signs of breakage or wear, just the treacly oil. The motor was not seized. I span it over on a starter and jump leads to test the sprags. They seemed fine but at this point it became clear that the engine had zero compression. It was easy to turn over by hand.
 I checked the valve clearances in case they had all closed up but they were all fine. So it was time to lift the cams and head.
 This is where things started to get hard. The cam cap bolts were incredibly tight. They are only supposed to be torqued to a modest figure (10 NM) but I was struggling to get them moving with a tommy bar on a 1/2inch socket. I broke three of my torx T30 bits doing this. In the end, I bought a special tough T30 bit from Screwfix and a new set of locking pliers. The worst ones were outboard of the camchain. These caps are particular important because the oil supply to the cams is delivered through them.
Cam bearing caps removed after a big fight, I can pull the valve buckets

Separate compartments in a sorter box to keep the buckets from being muddled up
I thought that had been hard. When it came to the main head bolts, it was going to get harder even though they accept a far more substantial torx bit. I'd had a clue that all was not well from looking into the block from the rear of the cylinders, through the rear water outlet. The cylinder liner I could see was very black and crusty. I couldn't understand why.
Cylinder head bolts in varying condition, centre right sheered off
The rear bolts were tight but not impossible. The front bolts were a nightmare. I was swinging on a one meter breaker bar to get them to turn. It was too much for two of the bolts which just sheered off. At least I could finally lift the head.
A very manky head gasket.
Cylinder 4, with broken head bolt visible top right.
Cylinders 3 and 2, broken bolt bottom left
The pistons are encrusted in oil and the head gasket in horrible condition.  The head on this engine incorporates passages for coolant and the gasket has holes to allow its movement.

The coolant passages in the head gasket are nearly all obstructed by crusty burnt oil, as are the passages in the head casting itself. The outside of the liners are encrusted in burnt oil. However, the cylinder bores look in really good condition - I can see the honing marks from manufacture on all of them. It seems to me as though oil from the head somehow got into the cylinders it blew through the water jacket. There was no obvious sign of oil around the jointed face outside of the engine. I'm guessing when the gasket went, it blew all of the coolant out of the bike. Must have been dramatic, to say the least.

The liners are very tight in the cases. I shall have to think carefully about how to free them off. I might try to drift them free from beneath, if I go ahead and split the cases. 


Friday, June 14, 2013

A Big Trip into the Heart of Wales

On Saturday the 8th of June 2013, I had planned to go on a BIG ride. My initial plans were thrown to the winds - nobody's fault, just one of those things. Not to worry. Nothing was going to stop me, I decided, and the fine weather forecast simply reinforced my desire to let the big Trophy have its head. Wales was beckoning to me, that marvelous land of mystery and adventure.

Scott Oiler fitted beneath RH rear panel
The previous week, I had fitted a Scott Oiler in preparation. I use these on all my bikes and am happy to do the wheel cleaning in return for a chain that runs smoothly over its sprockets. Whilst sealed chains have been around for years now, they do not keep lubricant around their rollers or help the sprockets in any way.

Oil changed, washed, charged, pumped up and ready to go
I had also  attempted to solve a small oil leak in the sump. The leak appeared to be coming from one of my NPT adapters. I wasn't particularly happy with this adaptor when I fitted it first time around so I had ordered a replacement kit from Vehicle Wiring Products. This one was much meatier so I installed it without PTFE tape as before. I'd intended to use my first oil change just as a way to gently ease the bike back into service and flush out any remaining dirt so I changed it at the same time as swapping the NPT adaptor. After covering 1300 miles since my rebuild, the oil came out brown but reasonable. This time, I used Castrol fully synthetic 10w40 bike oil from Halfords. The bottle claims improved acceleration blah blah but fully synthetic is pretty good stuff.

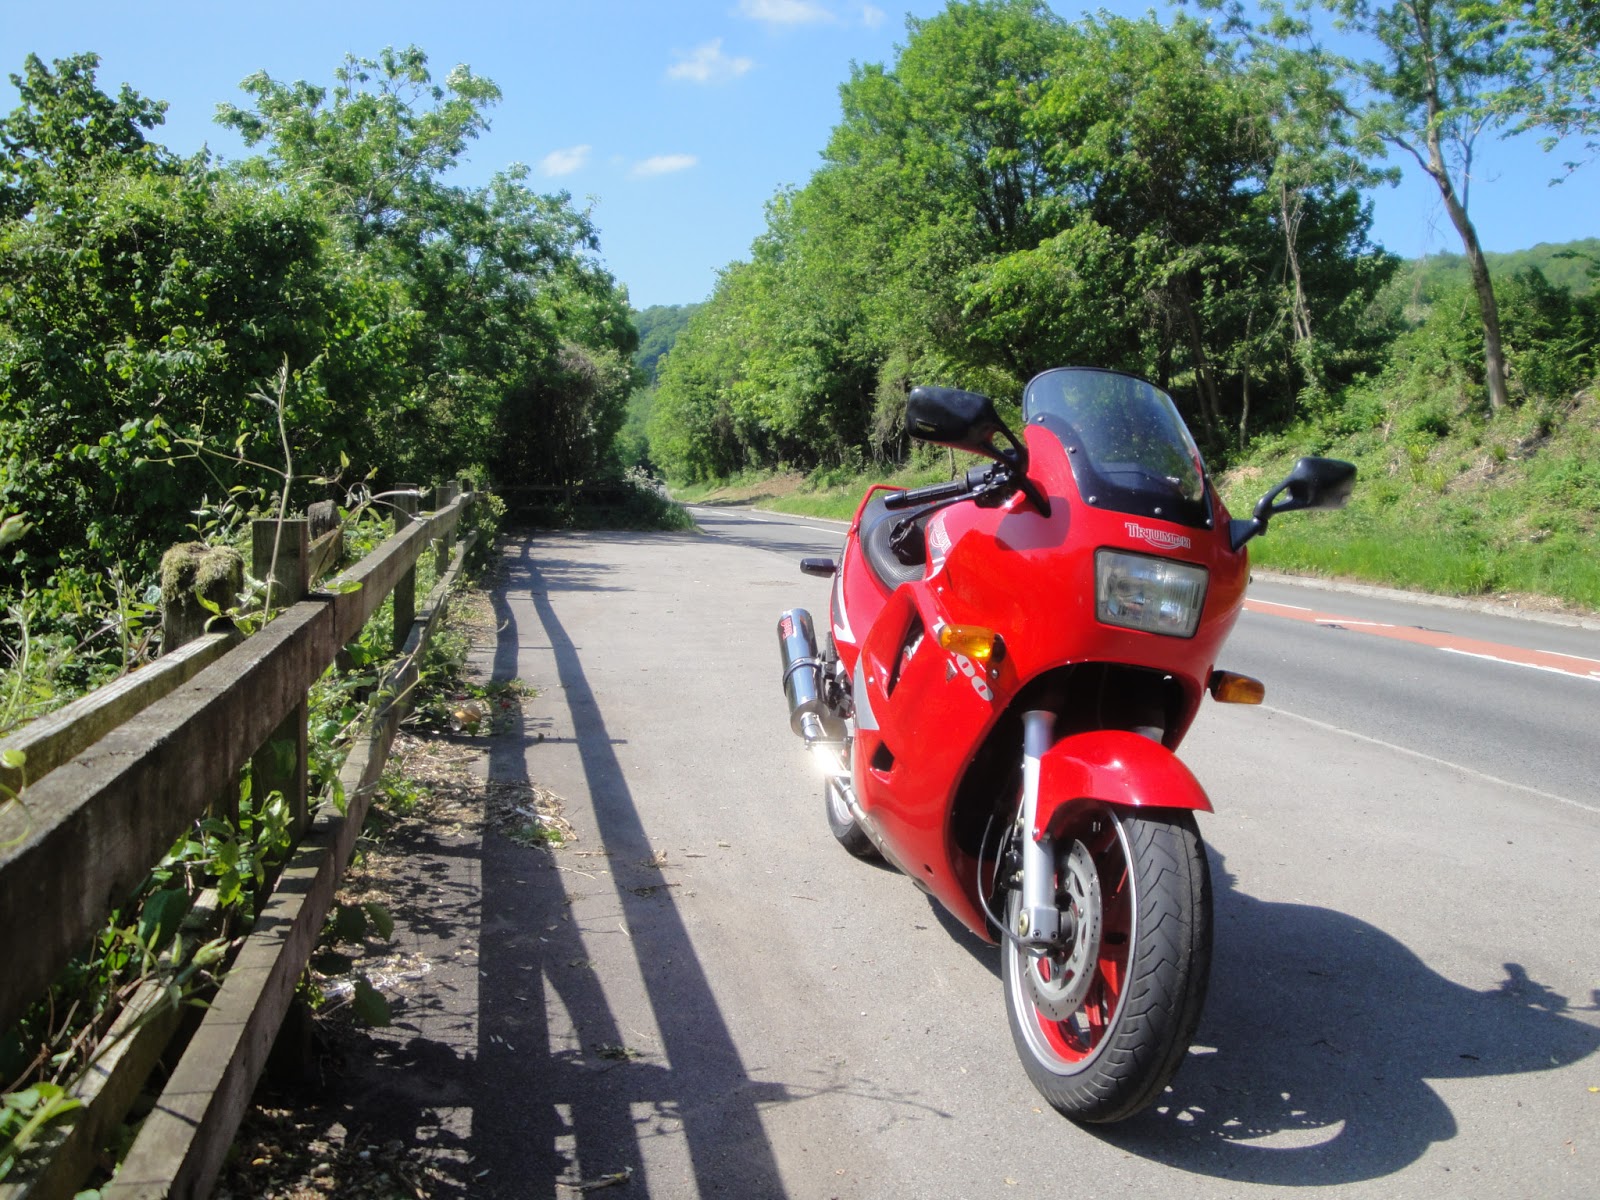
On a sunny June morning, the world awaits ...

After a spirited ride to Bristol, I stopped to fill up with some lovely V Formula from a Shell garage. I had decided some while ago not to use supermarket petrol anymore. It might be my imagination but I'm pretty sure I get about 10% more mileage from 97 octane fuel and carb fouling seems worse with supermarket fuel.

Fuel overflowing the filler neck
fuel running out of overflow pipe
 I normally fill the tank on the centre stand up to the level of the internal surge baffle. This time I filled it a bit higher, went to pay and for a comfort break (too many mugs of tea before setting off ...). When I got back, I was horrified to see a puddle under the bike and fuel running out of the overflow. I opened the filler cap and was amazed to see the fuel literally rising as I watched and spilling out of the filler neck. I'm guessing the heat of the engine had caused the cold fuel to expand to the point where the tank couldn't contain it any more. Doh! A lesson for the future there. I moved the bike away from its puddle and let it idle for a few minutes so the fuel level would drop for me to close the filler again without causing a petrolly splash.

 Next stop, Severn View Services on the M54 for general check on the state of things. My Scott Oiler injector had disappeared, leaving its delivery pipe waving around and lubricating only the road. Double Doh! I had used heat-shrink tube to secure the pipe to an aluminium plate but it had fallen off. Fortunately I had a spare zip tie with me and used that to keep the oil pipe against the rear sprocket. Centrifugal force could then carry the oil into the chain rollers.

A466 opposite Worgan's Wood, River Wye below
At last - Wonderful Wales. I skimmed around Chepstow and on to the sinuous A466. Utterly perfect riding conditions. I kept telling myself, all those grey winter days are in anticipation of moments like this. Swooping, sun dappled tarmac, and surprisingly little traffic for such a beautiful day. The bike just loving it: vrooming, flowing, sweeping along on a surging wave of torque, surfing the gears around 4000rpm. The woods and the River Wye winding along beside us as we go. The magnificent facade of Tintern Abbey seems to underline the timeless beauty of the landscape, for all that it is a reminder of the passage of time and the temporariness of the works of men.

The past is behind us, the road lies ahead
On along the Welsh border to Monmouth, then the A40 to Abergavenny. Next stop, guess what: the oil leak is back. This time I can see clearly where it is coming from because it is worse than before. Only my new NPT adaptor. Curses. The work I had done on this had meant I'd really cleaned up the sump area to stop the ingress of dirt. Consequently, I could now see much more clearly what was going on. And what was going on was not only that: oil was weeping out of the centre of the oil pressure switch at the rear of the sump.


So I had at least two leakage points before. This little reality check meant frequent checks of the oil level for the rest of the day. In fact, I was not losing so much that there was a noticeable change on the dipstick between checks. It's amazing how far small amounts of runny stuff can spread. I'd guess over the whole day it was about 100cc. Bad enough but still ...

The day rolled on via Merthyr Tydfil (they are truly lovely people - lunch in a pub with the Lions on the TV), the A470 through the Brecon Beacons National Park, past the Llwyn-on and Cantref reservoirs on the course of the Taff. Lots of bikes about at this point. I'm enjoying myself too much to stop though so on to Brecon itself and then to Talgarth and Builth Wells. 
A470 between Brecon and Builth Wells
 Well here's the thing. I thought I'd been totally spoilt by the weather and the roads up to this point. Only I was about to be treated still more. Perhaps in a different way. I'd decided to visit two points on the TOMCC Landmark Challenge. The first was on an unclassified road north of Landrindod Wells. The road was mostly single-track and so slow going but oh so beautiful. I saw a hare lazily crossing the road ahead of me at one point and a hawk drifting overhead at another.


The road snakes down into Rhayader, from whence I headed north east towards Abersytwyth. The second point I visited was south of Devil's Bridge. Again, the country was just stunning. I stopped for tea and a cake here but there was something unpleasant about it. I don't think it was just the 'Devil's Bridge' name. I wouldn't stop there again. On to the B4343 towards Tregaron, cutting through a pass and around the Afon Ystwyth. I'm not going to try to find words to express the beauty of this place. They would not be adequate.

From here, the highlight, it was time to head home. Lampeter was lovely - I can highly recommend the Shell garage there too. Old school friendliness and atmosphere. I was careful not to overfill the tank this time, that's for sure. The bike had been doing nearly 50mpg. My previous checks had it at between 40 and 45mpg. Could have been the fact I was on a long run. Could have been helped by the new ignition coils. Could have been the fully synthetic oil. Could be all of these things.

I gave myself a little time to contemplate the journey, sat in a corner of the forecourt with a chilled bottle of Vimto (you didn't think I was going to say beer?). A older gent was filling his car and came to see me after. 'A Triumph ', he said. '1200!' he exclaimed. 'I used to have a 650 with bars up to here' (gesturing at his chest) 'It was a great bike. Really reliable.' My Trophy glowed at him, and genuinely seemed to bask in the warmth of our conversation, as she dripped hot on a hot day. The 1960s and 2010s were suddenly in harmony. Bikers old and older shooting the breeze. And all was right with the world.

There is little to say about the rest of the journey. It was south to Carmarthen and then on the M4 at junction 49 (I didn't know there were so many junctions on the M4) back into England. The journey here was punctuated only by stops every hour to check the oil level. The weather held up well until the sun began to fade and the chill of Spring set in. It forced me to pull my spare jumper out of my rucksack. Home again, the day light fading, 390 miles ridden for no other reason than that they exist, I'm alive, and the Trophy 1200 likes to a really good stretch. Great. A day I know I'll never forget.

Home again, day light fading. Fab.
The next day, I was determined to fix the leaks for good. I drained my new oil into a clean oil bottle, and allowed the oil filter chamber to drain into a pan. I could be sure to keep dirt clear of the main drain plug but not from the oil filter cover. It is too crenelated for that so that oil (about 100cc) is for disposal.

I pulled the Daytona's oil pressure switch to replace the faulty one on the Trophy. It isn't easy to get to, or to extract. I remember struggling with it when I rebuilt the sump. So I bought a 24mm deep socket specially for the occasion and managed to do the job rather better. I cleaned out the threads with carb cleaner, cleaned up and painted the Daytona's switch and then reinstalled it with threadlock.


For the NPT adapter, I simply cleaned it off, added an O-ring and generously wrapped the threads in PTFE tape. Then the fully synthetic oil went back in.

A test ride showed a hint of oil but I couldn't tell if it was left over from my reassembly. A good wash and a hundred miles later, I'm confident the oil leaks are cured.


Tuesday, June 4, 2013

Classic fours at Sammy Miller's Museum


 I took some pictures of four-cylinder motorcycles at Sammy Miller's Museum.

1909 'FN'
  I'm sure most people think of singles, twins and triples as the mainstay of classic motorcycling. But fours were dreamed up by engineers pretty well from the beginning of motorcycling. The bike on the left is an 'FN'. Not a very glamorous name but it was created in 1909 so maybe before the marketing men got hold of the book of names.
Indian Chief

Henderson Super X

Pierce Arrow

Pierce Arrow - beautiful

1916 Henderson Four
1916 Henderson Four - engine close up


All Praise This Man - The Spirit of British Engineering
Total Madness - Shed Inspiration
I always fancied a big Kat. These days, she doesn't look so big. The engine does protrude either side but on the whole it has a slim aspect compared to modern full fairings.

Suzuki GSX1100 Katana