
I'd read a few articles and more than one stated that the process could be quite wasteful and that the writers had wished they could have treated more than one tank at a time. I decided to do the same and will post about the other tank after I've written about this one. My previous posting linked to a YouTube video from a company called Holden. They say the rust remover is reusable. POR15 says the degreaser is reusable too. Presumably both lose some of their effectiveness after each application but, even so, I planned to catch and filter them for future use. I wasn't sure how much of the tank sealer would be left over. I'd imagine it would be thick and gloopy - I was wrong about that.
In any case, it was too frosty (!) to use it for what seemed like for ever. The temperature got above 5 degrees last week and I decided I'd waited long enough. I drained the tank and found lots more of the old tank liner came out with the fuel. Plenty more was left in the tank, adhering with varying degrees of tenacity to the bare steel surface inside, as can be seen in the pictures below. I took them with an LED torch suspended through the filler neck.


I wasn't sure the degreaser would deal with the old liner adequately so I'd decided to use a couple of bottles of nail polish remover with a load of bolts before starting the POR15 process properly. Nail polish remover is mainly acetone - pretty aggressive stuff so ideal for the old liner but I was worried that it would damage the plastic parts of the fuel tap. Also, I wasn't sure duct tape would hold against acetone. So I decided to make up a blanking plate and one of the fuel tap rubber seals to keep it all in for the first part of my cleaning process. I had an off-cut of 5mm aluminium sheet that was about the right size. I wasn't concerned about the fuel level sensor because I think it is pretty robust.


 |
| Aluminium fuel tap blanking plate |
 | ||
| Bolts and nail polish remover; fuel cap waiting at rear of tank |
 With the blanking plate in place, I dropped a handful of large zinc plated bolts (12mm and 14mm) into the tank and then poured in two bottles of Lidl's finest nail polish remover and pushed a universal fuel cap into the filler hole.
 A cycle of vigorous shaking and resting ensued over a period of several hours. I had to leave it long enough for the acetone to soften the old liner so that the bolts could abrade it loose. I took the odd look down the filler hole but it was really hard to judge, not least because it was a very unpleasant place for my nose to be. I'd estimate about three hours and twelve five minute vigorous shakings later, I decided to drain out the gunk. The fluid was almost chocolate brown, with lots of rust residue which I had not expected, and came out with a fair amount of liner in it.
I then blasted around the inside of the tank with a hose which brought out a satisfyingly large amount of failed liner. The view inside the tank is in the photo below. Some of the old liner was still there and evidence of rusting can be seen beneath the head of the LED torch. This area is one of the lowest parts of the tank so it would be where water would have collected.

 |
| Mixing the Marine Clean degreaser |
 |
| Inside the tank after washing out the Marine Clean |
This time I left it for about an hour. The Holden video suggest at least 30 minutes and I wanted to be on the safe side.
That done, I removed the blanking plate and blasted out the tank with a cold water hose again. The colour of the drained out fluid wasn't as bad as in the Holden video but then we are talking about a post-acetone flush here anyway. It certainly brought out more dirt, rust particles and failed liner, leaving a much cleaner looking internal surface.
 |
| Fuel level sensor unscrewed from the bottom of the petrol tank |
 The Holden video says duct tape will be fine for sealing off all the apertures in a tank. I didn't want to take chances with the glue softening though so I got some new 3M tape for the job. I used contact cleaner around the fuel tap and fuel sensor apertures to make sure it adhered properly.
 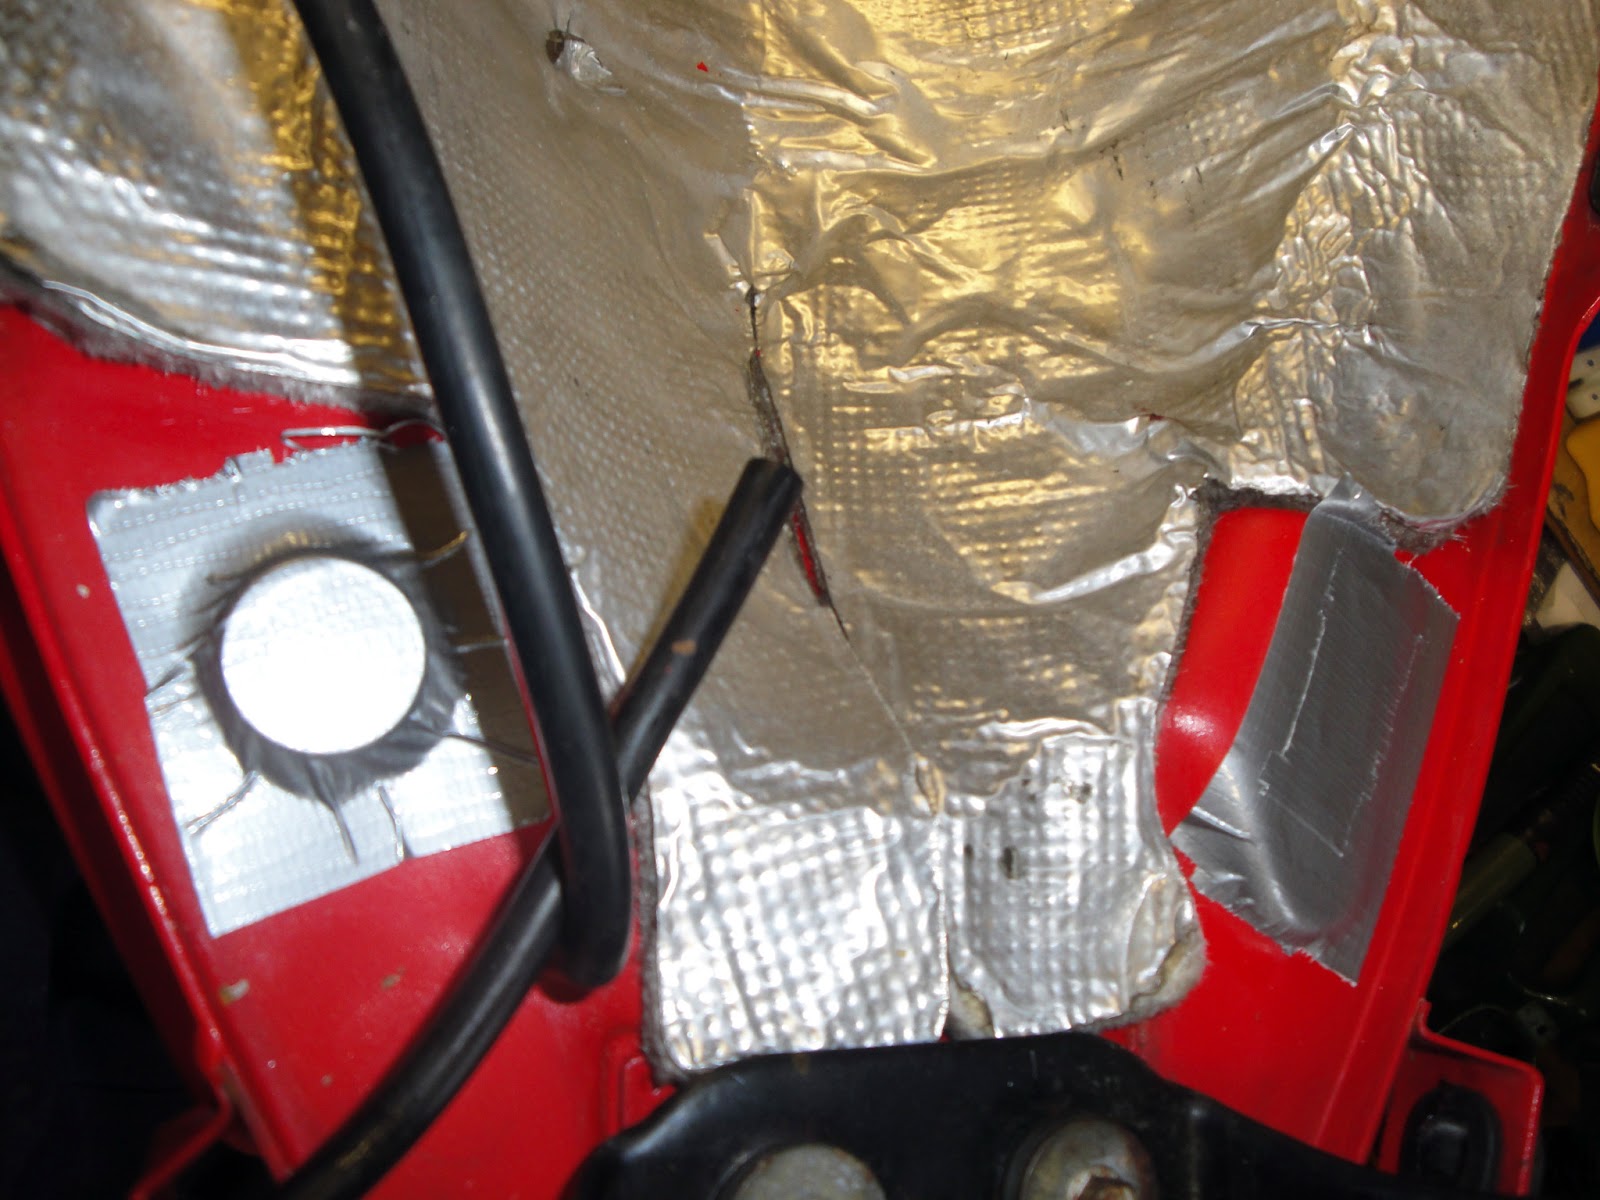 |
| Apertures for fuel sensor (left) and fuel tap (right) sealed off with duct tape |


Cue more shaking, turning, waiting and shaking. I left it about three hours this time. Having seen rust in the bottom of the tank, I wanted to make sure the solution had a good opportunity to remove it and provide a good key for the new liner compound.
Pulling off the duct tape from the fuel tap mounting, I drained the Prep and Ready out into a clean plastic bowl. Once more, lots of failed tank liner appeared with draining the rust remover solution from the tank. I couldn't believe there was any loose stuff left but there you are. I regret not putting the big bolts back in at every stage now to aid in its removal. However, it seemed to have done a good job on the rust. The next step was to flush with hot water so I poured in a kettle of just before boiling point, swirled it around madly then dumped it out before hosing out. Guess what - more failed liner appeared. There was very little left at this point but some still visible for all that.
The picture below shows how it left the bare steel around the fuel tap mounting in great shape. The paint had partially failed and rust had been creeping under it just here. The acetone lifted it partly and I removed the rest with a scraper so it was back to sound paint.

 |
| Clean and derusted but bits of old liner still visible to the right |
 The POR15 instructions and Holden advice is that the tank has to be totally bone dust dry before adding the tank sealer. It isn't easy to dry out a tank because there isn't much opportunity for the damp air inside to get outside. I assisted this process in two ways. I used a hot air blower to heat up the tank from the outside and aiming it down the filler. I put a lot of heat into the seams of the tank since I thought they would be most likely to harbour moisture. After that, I aimed the blower through the fuel tap hole and used a vacuum cleaner to pull the air through the tank. My aim was to get all the hot damp air out and replaced with hot dry air. It seemed to work well. It isn't possible to see into every corner of the tank though to tell if all the moisture had gone. I left it 24 hours before repeating the same procedure again. Time to seal! So more duct tape applied and ready to go.

 It took me ages to get the tin open. Honestly - I wondered if it was designed to be punctured, it was so tough to lift the lid. I gave up levering with a tyre iron and used a big pair of pliers to pull up on the lid in the end. The sealer is a silvery fluid and appears to be a type of resin mixed with pigments - it took a lot of mixing to even out the silver with a clear amber coloured liquid. I poured it in with the same funnel as before (but cleaned and dried off first) and then went back into shaking and rolling mode. The fluid is much thinner than I had imagined, I was relieved to find. It flowed about readily enough and could be sloshed around without difficulty inside the tank. I spent plenty of time trying to make sure I had rolled it adequately to cover all internal surfaces. I then used a small brush to paint around the filler hole and a metal collar that extends down into the tank by about an inch. The collar is a baffle to prevent petrol sloshing out with braking and acceleration.
  |
| The inside of the tank after treating with POR15 tank sealer (though before it has settled) |
The instructions are to allow 96 hours (four full days) before using the tank again. The puddle gave me a chance to track the process, at least externally. It has been two days so far and the puddle is completely hard. I had expected it to set to a kind of rubbery consistency - not at all. The surface is like a resin to the touch. So I'm pleased with how it has worked out so far, though the test will really come with our ethanol-laden petrol.
4 comments:
How'd you get the nuts and bolts out? Or are they still in there and you're going to be doing a good maraca impression over bumps? ;-)
Nice if lengthy job that. I've done similar with white epoxy tank liner from Wyldes before. It makes filling the fuel tank an oddly pleasing event.
I used one of those magnetic pickup tools to fish them out. It wasn't too hard because I'd used such big ones. M5 or M6 would have been tricky.
After the sealer in the tank had settled, it looked quite thin immediately beneath the filler and I wasn't happy with the coverage over what were the rustiest sections of the tank floor. So I taped a brush on a stick and painted on some extra sealer in these specific areas. I'm happy with it now.
The only remaining issue is that I've got a rock hard run on the surface where the fuel tap mounts. So I'll have to gently grind it back to the point where I feel the rubber seal will be able to do its job.
This is some pretty meticulous stuff. Does the weather (it being chilly or warm) affect in any way how the chemicals react to the parts, or it doesn't matter at all? Some cleaners aren't as effective when it's cold, same case for some parts which could become harder to clean.
German Zollinger @ TotalCleanEquip.com
Hello Herr Zollinger. The instructions on the POR15 kit stated that the process should not be attempted in cold weather. I think this is due to dampness as much as anything but I'm sure temperature makes a difference. I understand that humidity is necessary for curing but can upset the adhesion of the liner to the steel surface. I read a magazine article about preparing a petrol tank for lining. The advice there was to use biological washing powder in water as hot as possible. Heat will always accelerate chemical processes. So high temperatures make sense for cleaning. They don't make sense for applying the lining fluid though. I wanted to be sure the liner fluid really had coated the whole of the inside of the tank because I could imagine some compounds thickening up to the point that they are hard to persuade. As I wrote above, the POR15 is very thin in the first place. The fact that it was a cool day was a relief to me when I poured it in to my tank. I didn't feel there was any urgency or panic involved in sloshing it around. Also, the long cure process (96 hours) means it shouldn't thicken up appreciably during the application phase. A further reassurance to the bumbling home mechanic such as myself. I have since treated another tank in the same way and was even better pleased with the result.
When I met Mark at Triumph Factory 1, ( http://trimotorevival.blogspot.co.uk/2013/07/a-long-trip-home-for-old-trophy-1200.html ) he was very interested in how I'd lined my petrol tank - until I said it was 96 hour cure. That is not a practical proposition for a factory. The aggressive nature of ethanol is a problem for everyone at the moment.
Post a Comment