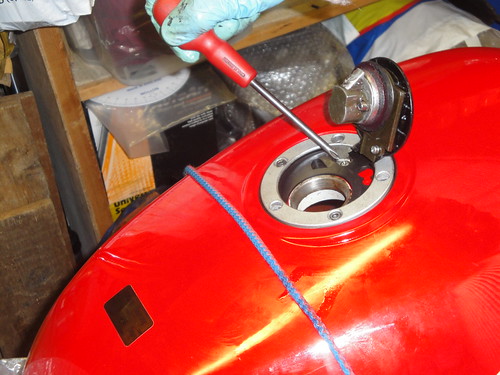
The cap is an aircraft-style flush filler cap, operated with a key in spring-loaded mechanism. The key hole is itself hidden under a sprung cover. This cover was loose, not snapping shut, and the key was not centering after the cap was pushed home. Not a big deal but I thought I'd see if I could clean out the components and restore some snap to the action.
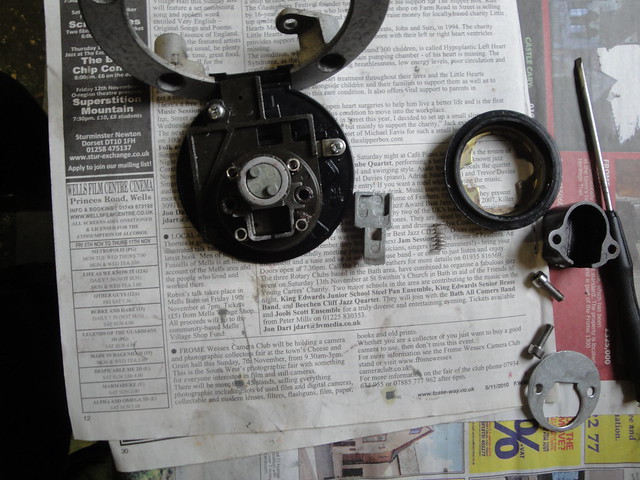
The main components of the cap are visible above, including a lid with rotating centre that is hinged to an alloy ring; a retaining tang which is drawn back by the two pegs on the rotating centre; a small spring which forces the tang out to retain the lid by clipping under the forward edge of the tank's filler hole; the main fuel seal which is held against the tank's fuel filler hole by four small springs; a tang retaining cover, and steel retaining disc and two screws which clamp the tang holder and seal in place.

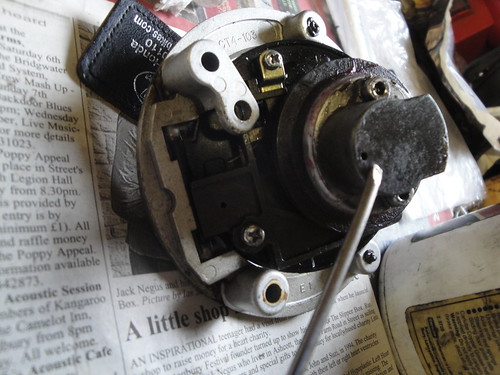
The little holes are indicated by the tip of a screwdriver in the pictures above. The left-hand picture above shows the cap without the main fuel seal in place. The four small springs visible around the rotating body apply pressure to the main fuel seal to ensure it works effectively. The right-hand picture shows the cap reassembled.
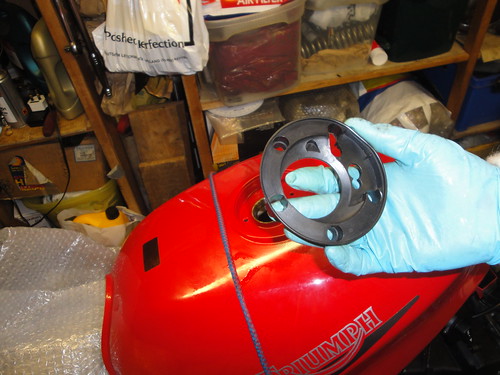
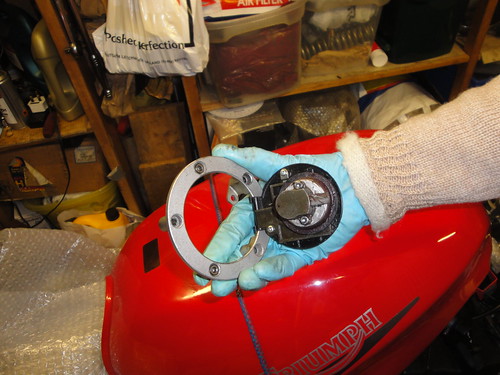
The cap assembly is retained by four screws into the top of the tank. One is under the lid, preventing the cap from being removed without unlocking it first, the other three are allen-headed screws that pass through the periphery of the hinge ring. Two of the allen-headed screws are just decorative. A rubber dust and dirt seal fits into the top of the tank first, followed by the cap hinge ring.
I cleaned off all the corrosion from the components and lubricated the rubber seal with rubber grease, and the spring-loaded tang with copper grease. I replaced the inner screws with stainless items. Job done.
4 comments:
Hi there Lee, Saw a link to this Blog on the Yahoo Group Messages page...Important thing with these Tanks and Filler caps is to make sure the Internal Vent Tube that runs through the tank, from the hole underneath the Filler Cap on the LHS (9 O'clock position) to the Vent Tube outlet pipe (rear lower rh corner) and the rubber vent tube, is clear and unblocked. My MkI BBB had a extreme case of the whistles and whines until I discovered an 'organic growth' (much like semi-congealed phlegm) inside this Vent Tube. Took a long flexible CamelBak Tube cleaner to it, followed by Rust Inhibitor and a drying-off period. This Internal Vent Tube is also the escape route for any rainwater that collects in the Fuel Filler Cap location...so if it's blocked it spills over into the fuel which is not good. The Internal Vent Tube (if clear) also allows further air back into the fuel tank to replace fuel used during normal usage and high-speed runs - so if you've experienced Fuel Starvation symptoms then it is more likely to be this Vent tube and not the holes in the filler cap. Hope this helps..
Cheers
Gordon Smith
2xBBB
Stroud, Gloucestershire, UK
That's a good point. I hadn't thought about the overflow tube also serving as a means for the tank to breath. I've experienced fuel starvation a couple of times at low speed with a tank bag in the rain: the bag has created a seal around the filler cap thus preventing air from getting into to the tank. If the overflow tube had been clear on those occasions, it wouldn't have been a problem. I can remember noticing that my overflow tube has been pinched on other occasions after I refitted the tank. It could be that this was also the case on those wet rides.
So I'll give the metal overflow duct in the tank a poke through with a pipe cleaner and check the routing of the overflow pipe carefully from now on.
My Daytona 900 cut out last night after showing fuel starvation symptoms.I opened the filler cap to find out I hadn't run out of petrol.it them started again straightaway and got me home no problem.then I heard the breather hole or whatever so Singing and deduced it could be blocked filler cap hole, I shall be checking the points mentioned.thanks guys,pete
Hope you get sorted. It's get to get pings like this, to see others are keeping T300s rolling. Cheers
Post a Comment