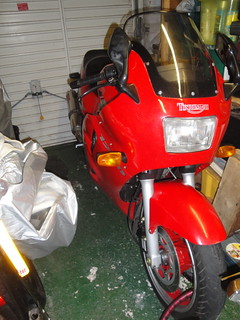
Showing posts with label forks. Show all posts

Sunday, June 7, 2015

A tool to help strip Trophy, Trident and Sprint forks

In my last post, I referred to a special tool I had made to assist in stripping the forks on my 1991 Trophy 1200. They are the same as for Tridents and Sprints of the 1990s. The tool is not necessary if you just want to change the oil or the springs in the forks. It is only needed if you want to separate the stanchions (chromed steel legs) from the fork lowers (cast alloy 'sliders'). That's necessary if the seals are leaking and need replacing, or if you want to change the bushes. I wanted to do both so had to strip the forks right down.

A note on diagrams: Ling's has loads of exploded diagrams in the parts section of their WorldofTriumph website. I have found them helpful to see what goes where, quite apart from sourcing parts. However, it is a bit of a maze to follow the lines to understand the order of things.

The process begins with removing the topcap (number 17 in the diagram below); this is best slackened two turns before removing from your bike then, when the fork leg is off the bike, clamp the stanchion in a soft-jawed vice (I use a wooden Workmate-type of bench), bear down with your weight to counter the internal springs and wind all the way out. Pull out an internal spacer tube (16), fancy washer (15) and the fork spring (14). Warning: they'll be dripping in oil and possibly foul-smelling, depending on how long it has been since the oil was last changed. So you'll want a sizable container to stand them in as well as something to collect the waste oil. Unclamp the stanchion and then invert the leg over your waste oil collector. I like to flush out the dregs next with Parafin. About 100ml will do a reasonable job. Pour it in and work the stanchion up and down 10 or 20 times, then invert again to pour it out. It should be a satisfyingly horrible slush. Now compress the stanchion in the slider, making it as short as possible.
Image courtesy of Ling's 'World of Triumph'
To separate the stanchions from the sliders, you need to remove a spring clip above the top seal ( undo a large Allen-headed bolt (number 18 in the diagram) from the very bottom of the slider. It is hidden away by a rubber bung (number 23 in the diagram) and sits in a recess above the hole where the axle normally lives. This bolt winds in to the main damping component, the damping cylinder.

The damping cylinder (number 11 in the diagram) is cylindrical (!) but is easier to understand as a piston which moves inside the stanchion. It works as a damper because it moves through fork oil when the leg compresses or extends, thereby slowing and controlling the action of the fork leg.

It is difficult to remove the Allen bolt because the damping cylinder tends to rotate inside the stanchion when you try to undo the bolt. The cylinder is in nice slippery oil and the bolt is a tight fit so that's understandable. So something is needed to hold the damping cylinder still whist the Allen bolt is unwound. Triumph do a special tool for this (adapter, front fork cylinder).

Unfortunately, I was mid-job when I discovered the ineffectiveness of the various bodgy techniques I've got away with in the past plus the price of 'special tools' is usually much too special for me. So I thought I'd make one.

 I measured the size of the hex in the damping cylinder to find it was 30mm across the flats. A trip to Mole Valley farmers produced a pack of 30mm af nuts for M20 threads and they had  lengths of M20 threaded rod too. I can't remember how much these cost but less than a tenner all in. I measured down the compressed fork leg to see how much I needed and cut so the nuts would just protrude enough for me to get purchase on them. 18" (45cm) did the trick. Then to make the tool I locked two of the M20 nuts against each other at each end of the rod. That way, they would grip the rod when I wound out the Allen bolt.

A pack of M20 nuts that are 30mm across the flats,
M20 threaded rod, cut to length with two nuts
locked against each other at each end.

 Then it was a case of inserting tool into the compressed fork leg, carefully engaging the lower end into the hex of the damping cylinder, using a spanner on the nuts at the top end and an Allen wrench at the other. It was still hard work because the threads are tight and even compressed the fork leg is long to be wielding spanners at both ends. I clamped the calliper lugs on the fork slider in my workmate to hold it steady as I was doing this. If'you can get a helper to hold one of the spanners, so much the better.

Have fun!

Thursday, June 4, 2015

52600 miles: Nissin Four-Piston Callipers and front fork bushes rebuild

After 52,600 miles, 15,000 under my stewardship, the forks were leaking and a baggy feeling. The two-piston callipers had suffered over the winter and were binding. So I thought I'd give the front end a refresh. 

I did the brakes first. I thought I'd give the callipers from my dormant Daytona a bit of a birthday with a scrub up and use those for a while. That would allow me to spend some time on the Trophy two-piston callipers. The Daytona uses Nissin opposed-piston callipers, two per side of each disk (four per calliper, eight in total). This contrasts with the Trophy callipers, which rely on two pistons acting on one side of the disk, with sliding pins bringing a secondary brake pad into contact with the other side. Sliding pins are pretty notorious for getting sticky. Opposed piston callipers should be more robust, as long as corrosion does not creep behind the piston seals.  

Splitting one of the Nissin four-piston callipers,
and pleased to find it was in good shape
 When I split and dismantled the Daytona callipers, I saw that the anodised finish had been applied to the whole casting after machining. I'd never seen this before. The benefit is better corrosion resistance in the grooves where the rubber seals sit. So they didn't need too much work to clean up ready for reassembly with red rubber grease and a smear of copper grease on the edge of the pistons where they contact the brake pads.


I decided to replace the master cylinder piston and seals because they are 21 years old (the Daytona was made in 1994). They looked to be in good shape, with the exception of the dust seal around the piston. This had a small tear. I've see water accumulate behind these before with nasty corrosive consequences so it was worth changing this anyway.


Daytona disks stripped cleaned and centres repainted silver


 The forks were pretty straightforward to strip because I made up a tool to hold the Trophy's inner damper units when I did them first. These units are retained by a large allen-headed bolt through the bottom of the aluminium outer. The damper has to be held still with a hex-headed rod to undo the allen bolt. It can be a real pain without something that fits the hex. I found some big nuts - (30mm see next blog post) - and suitable threaded rod at an agricultural supplier. I locked the nuts against each other at each end of the threaded rod so they would not rotate on the rod and it worked a charm with a large adjustable spanner to keep it still as I cracked the thread on the allen bolt with a 3/8 drive Allen bit on a tommy bar.

There are two bushes in each leg: one is at the top of the aluminium outer, or 'slider', and the other is on the bottom of the stanchion. The bushes were easy enough to do, the top bush coming out with vigourous working of the stanchion in the outer, after removing a retaining ring, and using a small flat screw driver to spring open the lower bush to slide it off of the chromed stanchion. I had trouble plastic oil control rings that fit into the dampers - I bought the wrong ones for these forks. Doh! So I reused the old ones.
The bodywork always seems to come up well
with wax shampoo 
All shiny again, but more brakey!

Ride out in the dusk of a beautiful Spring day

Thursday, April 3, 2014

Oily engine - proves its a real Triumph :-)

I'd noticed an oil mist around the cylinder head in the days running up to my winter clean up. Well OK, it was more than a mist. It was a seep. And then a bit more than a seep. And then it was obvious quite a lot of oil was escaping from the cam cover. I must admit I was disappointed by this because I'd replaced the large rubber gasket when I'd been through the engine in 2012. I had also gone along with applying instant gasket as per the factory manual's instructions though at the time I'd thought it was overkill. Oh well.

The fairing lowers had to be removed so I could get the cam cover off and anyway I couldn't bring myself to leave the engine so oily. Also, as I wrote in my last post, the left-hand fork leg was leaking badly and I couldn't get to the lower yoke to remove them with the fairing lowers on. So off they came.


 It hosed down nicely. 'No rusty!' as one of my German friends used to say about his leaky XS650. So degreasing, agitating with a brush and hosing down showed things are holding up well under it all. I was particularly relieved to see that the oil cooler was still in good order.

Oil soaked fairing inners. 
The oil had accumulated inside the fairing lowers. This was not at all nice, especially because the lowers in the early T300s have sound deadening foam pads adhered to the inner surface. They also turn out to be excellent gunge sponges. Yuk. However, Vanish Engine Degreaser did a great job on sorting them out, with a good hose down to finish.

When I'd refurbed the forks first time, I had just filled the rusty pits and repainted the lowers. I'd figured there was no point in putting any work into them until I was sure the filler has taken. I didn't even replace the fork seals in case the repair didn't work. Well the right-hand side has born up well so I'm confident I can sort the left-hand side and so will replace the seals and nylon fork piston ring. I popped by Trevors to get the parts so was ready to go. I tried to strip the forks but got stuck on removing the chromed stanchions from the alloy fork sliders.  Blast!. I'd made up a tool for my Daytona for  separating the sliders from the stanchions. It is necessary to stop the internal damper assembly from spinning when trying to remove the Allen bolt that holds the two large components together. But it was no use on the Trophy because, according to Haynes, it needs a 33mm hex end. The Daytona's adjustable Kayaba forks need a square section tool to stop the M8 allen from just spinning the whole damper assembly inside.

As Ruby is my daily transport, this represented something of a problem. So for the second time, the dear old Daytona came to the rescue by lending Ruby her forks. Further more, in case I had not properly sorted out the leaky cam cover, I didn't want to replace the fairing lowers without being sure it was done. So the Daytona also leant Ruby some little aluminium trim panels I'd made up years ago. The result is rather pleasing, at least for now.

Ruby with borrowed Daytona forks and aluminium fairing trim


Sunday, May 19, 2013

Adjusting preload on front suspension

I had guessed at the best length of the spring spacer on my front forks, after deciding the standard spacer was making the front end too harsh. The standard spacer is 110mm long but, as my replacement springs are 20mm longer than the springs I took out, this was preloading the replacement springs quite significantly. So I made up a pair of 90mm spacers. These turned out to allow more sag than I wanted so I decided to add an additional packing for the replacement springs. Also, the 90mm spacers were from a narrower diameter tube than the standard spacer (which has a diameter of 38mm). 
90mm spacer shown loose in stanchion
 I decided to use o-rings to keep them centralized in the fork tube. I bought a Hilka O-ring kit some time ago and it included some that were just right.They made the spacers a snug fit in the stanchions so I have better confidence the forces will be centralized and distributedevenly.

Top 3mm disk being installed over 9mm spacer and lower 3mm disk
I added the additional length to the spacer I made up before with two 3mm thick disks and an extra section of tubing 9mm long. I cut the disks out of sheet aluminium with a drill attachment and a jigsaw: a very noisy business. It took a fair amount of filing to sort them out after the power tools but I was pleased with the result. This means the total spacer length is 86 + 3 + 3 + 9 = 101 mm.

I rode south to the Sammy Miller Museum today and was pleased with the result. The ride is firm but not overly firm. This is a matter of personal preference of course. It feels more controlled than with the 90mm spacer but just that bit more compliant than 110mm.
TriMoto 1200 outside the Sammy Miller Museum

Friday, October 19, 2012

Lowering front suspension

After riding my renovated Hinckley Triumph for a few weeks now, I'm forming a better impression of how it behaves on the road in various conditions: wet, dry, dual carriage ways, A-road and B-roads. Compared to my 900, the 1200 Trophy provides a much smoother and roomier ride. The power is delivered with less vibration, the bars are more upright, and the suspension rides over ripples and bumps more evenly.

DSC05653
The power builds more slowly at first but gets exponentially stronger with a noticeable woosh between 3500 and 4000. At 6000, the engine note takes on a harsher edge, vibration intrudes and the whole world seems to go into reverse. The bike is supremely stable at all times. However, the steering is noticeably slow compared to my Daytona. The effect is a swoopy bend swinging experience that adds to the sense of smoothness. I could wax lyrical Jaguar style: grace, pace and space.

DSC05654

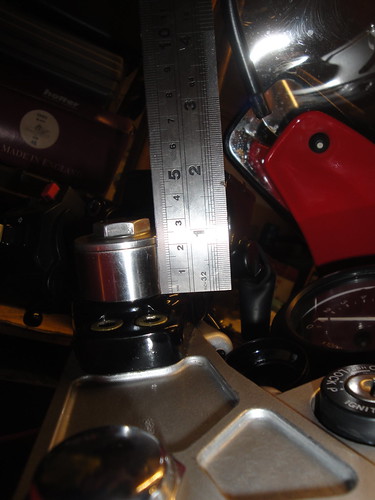
I thought I'd experiment with the degree of fork pull-through. The effect of more pull-through would be to marginally change a number of things that can influence the steering. It will reduce the front ride height, lower the center of gravity, steepen the steering angle, reduce the trail, and I'm pitch me further forward an inch. This should make the bike respond more quickly to steering input. Triumph list a range of pull-through settings for different T300 models. They are measured from flush with the top yoke face to the top of the steel fork tube, just below the fork top nut:
  • Trophy, Trident & Sprint to      VIN 29155: 25mm
  • Trophy, Trident & Sprint from VIN 29156: 20mm
  • Daytona & Speed Triple to       VIN 29155: 28mm
  • Daytona & Speed Triple from  VIN 29156: 0mm (flush)
I had already allowed an additional 10mm (total 35mm) of pull-through to compensate for the fact that I'd installed 20% stiffer springs. I'd calculated that the difference in spring rates would mean so doing would maintain approximately the standard ride height. So this time, I pulled the forks through an additional 14mm (24mm), or just under and inch in total above the base figure.

Extra24mm

Although as I say such a change will result in a very small difference in each of the relevant parameters, the nett effect can be noticeable. Would it be for me?

Stanchions proud of handlebar mountings


The answer is yes. I'm afraid it is still a case of impressions rather than hard data but I'd say my Trophy 1200 feels very very similar to the Daytona 900 like this. There is no hint of delay now between input at the steering and effect on the machine. Dropping the front by an inch means the seat is about half an inch lower. Although it means my hands are an inch lower, the angle of hands to forearms, shoulders etc. is unchanged. The ride feels that bit more direct.

Some issues to be aware of:
  1. it is much harder to get the bike onto its center stand now. Far harder. Herniating, I shouldn't wonder.
  2. the belly pan is an inch closer to the road - sleeping policemen must be treated with caution, bumping up curbs is totally out (a good thing not to be tempted to do). 
  3. the steering is more sensitive to running over cats eyes now. 
 I can live with all of these things for now.

SitsLower

Thursday, July 5, 2012

Pitted fork repair, Sprint Manufacturing 20% uprated springs, and front wheel refit

With the forks removed, I could see how much pitting was present on the stanchions - a lot, as it happens, although each individual pit was pretty small, maybe up to 1mm across.


I decided to try filling them with Chemical Metal epoxy paste on the grounds that, well, it just might work. If not, I'll get them reground and hard chromed. So I degreased them with cellulose thinners and dug as much of the dirt out of the pits as I could with a pin, wiping as i went. Then I mixed up the Chemical Metal a bit at a time and covered the affected areas. It goes off very quickly (about 5 mins) so I had to repeat the process lots of times. 

After leaving it to cure completely overnight, I trimmed back the excess filler with a sharp blade and rubbed the stanchions down with 800 grade wet and dry paper. The finish was smooth and reasonable. I've no idea how robust it will be. 


I'd decided to fit some 20% stiffer replacement fork springs from Sprint Manufacturing. I carefully measured lengths as I went. First, the difference between fully compressed and fully extended is about 145mm. Second, the standard spacer is 110mm. 


The springs I removed were 470mm in length (the shorter, darker spring in the picture below). I would say the 'standard springs', which I believe them to be, but who knows whether a previous owner changed them. The Spring Manufacturing springs were about 490mm in length. I could have cut the spacer down accordingly (to 90mm) but decided I would treat it as an additional 20mm preload to start with and then shorten if required later on. This meant being very careful in compressing the springs to refit the top nut but they went together well.

I decided to try comparing the spring rates. No pics I'm afraid but I did this by placing an old kitchen scales upside down on each of the springs and then compressing them for 1cm. I was surprised to find that the Sprint springs were about 6kg per cm whereas the ones I removed were 6.5kg per cm. In other words, harder. So maybe they aren't the originals. However, the Sprint springs have two pitches  whereas the springs I removed were evenly wound along their entire length. The manual indicates that the originals should be twin rate. I decided I'd try to see what the rate of the Sprint springs are when the close-wound section binds. I did this by clamping the spring in my workmate just above the close-wound section and repeating the scales trick. This time, it showed a rate of 7kg per cm, so about 17% stiffer by my imprecise measurements - close enough to Sprint's claim for me to believe all is in order.


 Forks reassembled, I decided to fit a pair of stone guards. The clamp just above the dust seals. Hopefully, they'll help to keep the Chemical Metal repair functional for a little while at least.


I decided to pull the forks through the yokes slightly more than standard because the stiffer springs would make the bike ride slightly higher than normal, marginally slowing the steering geometry. Again, it's an experiment. The fact that I now know the difference between full extension and compression means I can adjust the down some more as long as I leave at least 145mm between the bottom yoke and fork seals.


I found that the front wheel axel was rusted internally. There is a plastic bung on the left hand end that had been damaged, allowing water ingress. So I cleaned it up with a drill and thin wire brush, primed and painted it before coating the bung in waxoil and refitting. I also gave the front axel nut a birthday.


 I like polishing. The fork top nuts and speedo gearbox gave me a chance to break out the Solvol and bling it up :-)


 Plenty of LM grease on the axel and the wheel is back in place. The axel can be held still with a tommy bar through the left hand end whilst the nut is pinched up. There was zero clearance between the fork legs and the wheel spacer (left) and speedo gearbox (right) so it was a performance getting the wheel in place. I managed it in the end by slackening the fork clamp bolts in the lower yoke and slightly twisting the sliders.

For torquing the axel up, it is necessary to tighten two clamp bolts in the left-hand fork leg so the axel doesn't rotate. The two clamp bolts in the right-hand leg can then be torqued too.


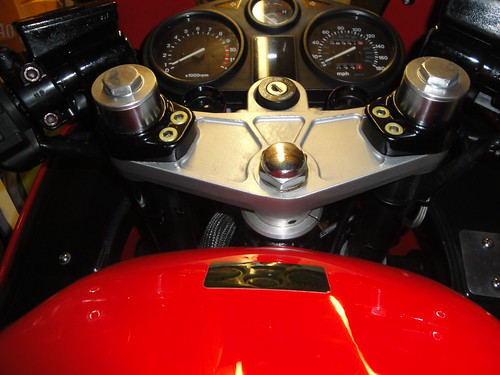
 Handlebars and clocks loose fitted, starting to look like a bike again.